Monday, January 31, 2011

Ella's 6th Birthday in Pixie Hollow

I did it. I survived "Birthday Season" at our house. And I must say, we went out with quite a bang. On Saturday, Ella celebrated her 6th Birthday with family, some longtime friends and a couple of her classmates. The theme was Tinker Bell / Pixie Hollow...and I would just like to say "Thank You" to Disney for their help. Pretty much all of my inspiration came straight from the Disney Fairies website. I took some of their ideas, tweaked them and used them to fill in my little "format" that I've come up with for our birthday parties. I like to have a craft, a game, gifts, cake and a pinata.

We began the party with some free time. In the past couple of years, I've learned that it is best to begin parties that way. Not everyone shows up on time plus Ella really loves to show her room and belonging to her friends. So, it was extremely loud in our house for awhile. Ella has an exuberant personality...and attracts friends with the same tendencies.

After about 30 minutes of loud chaos, it was time to calm things down and work on a craft for a bit. The Disney Fairies website had a very cute Rosetta Frame Craft. (You can catch a glimpse of the frames on the mantel in the photo above.) The pdf includes instructions, a template and some printable "clovers" to decorate the frame. I also printed some extra decorations from the Disney Fairies website so the kids would have more options. I ended up resizing and printing birds and berries from the First Flight Garland pdf. Last week, we collected a bagful of sticks at a local park, and I used them to build the frames ahead of time. All the kids needed was a Q-tip, some glue and decorations to create their masterpieces. When they had finished putting on the paper decorations, they had the choice of adding glitter to it as well. I had them put the glue on the frame and place the frame in a shallow bucket before shaking on the glitter. (The bucket is KEY if you want to contain the glitter!) The finished frames were soooooo cute! We also made sure that Ella took a photo with each friend, and we'll be mailing them a photo to put in their frame.

For the game, we had a variation of "Pin the Tail on the Donkey." I created a huge tree on one of our walls to resemble the Home Tree in Pixie Hollow. Then the kids had to pin the pixie dust on the Home Tree. Right away, Olivia, one of our youngest guests, pinned her pixie dust right in the center!

After the game, all the kids sat near the Home Tree and Ella opened her gifts. I know some people don't feel that it is appropriate to open gifts at parties, but I disagree. I think that it is a great opportunity to teach your child to accept gifts graciously and demonstrate their thankfulness. Before the party, I clearly expressed how I expected Ella to act during gift time, and she did not disappoint me. We like to set up two special chairs durings gifts -- one for the Birthday kid and one for the guest giving the gift. This ensures that the gift giver gets an up close view of the unwrapping and gets to feel special too.

Next it was time for cake. Although the cake wasn't perfect (mine never are), I thought it turned out pretty darn cute.

I made a set of Fairy Houses and a dozen "mushroom" cupcakes. Thankfully, Ella loved it. (See a tutorial of the Tinker Bell & Terence Cake and Mushroom Cupcakes.)

Last but not least, we let the kids have a whack at the Acorn Pinata. Ella's classmates Dylan and Max have quite a lot of power in their bodies, so we saved them for last and let the smaller guests have a try first. Dylan did not disappoint and broke it open for us.

Unfortunately, Ella got her party bag confused with another friend's and ended up putting her loot into his bag. Vera came to the rescue though and offered some of her treats to Ella. Afterward, Ella said that Vera's generosity was her favorite part of the party. When all is said and done, the decorations, the games and the food don't matter all that much. It is the good times that we spend with those we love.

Friday, January 28, 2011

Planning An Inexpensive Tinker Bell Party


We have never had a big budget for birthday parties; however, I don't let that stop me from making a special party for my Birthday Girl. This year, Ella's party theme is Tinker Bell. Here are just a few ways that we cut costs but still are planning to create a fun memory for her:

Create our own invitations. I like to make invitations, cards and the like so I usually have a stock of plain white cardstock and invitation envelopes at my house. Then, when I need an invite or card, I just design one on the computer and use the internet to search for appropriate graphics. Personally, I love having creative control over the invite, and it is worth it to me to take the time to make them on my own. Because I already have the supplies at home, it is also very cheap for me to do. I figured it out once to cost about $0.15 each to make them. However, if you need to buy all the supplies and don't plan on using the extras for another purpose, it makes more financial sense just to buy the pre-made kind.

Mix and match paper goods. I can still remember my 5th Birthday Party. One of the things that excited me the most was that my mom had purchased decorated "Super Heroes" plates. So, it was no surprise to me that Ella wanted Tinker Bell paper goods. Personally, I don't like my party table looking like a Disney Animator threw up all over it...and buying all the "coordinated" items is not the most cost effective way to go. It seems as is if most "designer" party supplies cost about $3 per package of 8 items. If you've got more than 8 guests (like we do), then you have to buy multiples and that adds up very quickly. This year Ella and I compromised -- we purchased just the Tinker Bell napkins and then chose pink and yellow cups, plates and tablecloths. We got what we needed at just a fraction of the cost.

Search online for decorations. I hit the jackpot with this theme. Disney has a HUGE amount of free "fairy" stuff online at http://www.pixiehollow.com/. I made a cool Birthday Banner using the First Flight Garland pdf and some wall decorations by cutting out the flowers from this Arrival Day PDF.

Search online for craft ideas. Disney also has some great craft ideas as well. We're going to make Rosetta Frames that will practically be free. We collected the needed twigs from a local park and used some cheap green yarn.

Make our own pinata. A storebought pinata usually costs at least $15 but you can usually make them for practically free using household supplies. Check out how I made our Acorn Pinata for the Tinker Bell party.

Make our own cake. My girls love to peruse the "cake book" at the grocery store. But, I just can justify spending $25-40 on a storebought cake when I can make my own for less than $5. With the right tools and imagination, I can make a cool enough one to please my girls. Lucie loved her Princess Cake this year, and Ella has loved her Fancy Nancy Explorer Extraordinaire Cake and Castle Cake in past years. If you need inspiration, check out Fishmama's cake ebooks - Pretty.Cool.Cakes. and More Cool Cakes. I'm going to use these cool pans to create a Tinker Bell house that looks similar to this Fairy House Ornament craft.

UPDATE 1/31/11: The party was a huge success! Check out exactly how we celebrated Ella's 6th Birthday in Pixie Hollow.
----------------------------------
For other money-saving ideas, be sure to check out Frugal Friday at Life As Mom.

Thursday, January 27, 2011

Bonnie's Birdhouse Cake

January is a busy month for birthdays around these parts. My mother-in-law Bonnie was in town recently so we had a belated celebration for her. My father-in-law has always loved birds, however, Bonnie has taken an interest in them as well in the past year. Their backyard is filled with various kinds of birdfeeders. So, I decided to make a Birdhouse Cake this year. I was inspired by the shape of Fishmama's Tangled Cake
Although it was far from perfect, I thought it turned out pretty cute. If there is a bird-lover in your life, they just might enjoy one of these too. Here's how I did it:

What you need:
What to do:
  1. Divide the cake batter between the greased mini-pans and round cake pan. Bake according to package directions. Remove from pans and cool completely.
  2. Place the large round cake on a cake board or platter. Put enough frosting to coat it in a separate bowl and tint it brown either with cocoa powder or brown paste food coloring. Frost cake. Sprinkle with green sprinkles and let harden in the fridge for a few minutes.
  3. Build the birdhouse by placing one mini cake in the center of the large cake, adding a layer of frosting and stacking another mini cake.  Repeat until all layers are used. Skewer a straw or chopstick through the center of the cake tower for stability. Coat the "birdhouse" with a crumb coat of frosting and let harden in the fridge.
  4. Tint a small amount of the frosting with black paste food coloring for the birdhouse "hole" and tint the rest the color of your birdhouse (I used yellow). Frost your birdhouse tower and then add a black circle for the entrance. Cut off a piece of straw to use as the perch, and insert it below the black hole.
  5. Create a cone out of colored cardstock to use as your roof.
  6. Print out a picture of a bird, cut it out and tape it to a toothpick. Insert somewhere in your cake.
--------------------------------
For other birthday cake ideas, be sure to check out Fishmama's Birthday Cake Round-Up at Life As Mom. She also has some great cake ebooks -- Petty.Cool.Cakes and the newly released More Cool Cakes.

Wednesday, January 26, 2011

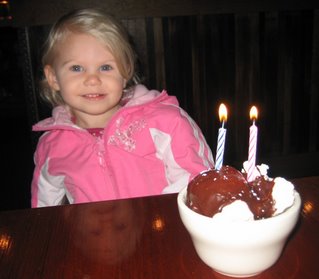
Happy 6th Birthday Ella!

Today is a special day! Ella turns 6 today. Oh my, how my baby has grown!


Since she is going to be having a party this weekend, we're keeping things low key but still trying to make it different from just any ordinary day. We headed out early this morning to stop for a muffin at a coffeeshop before school. After school, we're going to head out of town for lunch and a bit of shopping for Ella's party. Then later tonight we're going to have Chicken Scampi (her choice) at home. I confess, since I'm planning on a cool cake for her party, I'm not making her one tonight. I went the easy route and bought a small chocolate Pepperidge Farm cake from the grocery store. As a mom, sometimes you just have to take shortcuts for sanity.

Happy Birthday Ella!

Tuesday, January 25, 2011

How to Make An Acorn Pinata

We are entering the final stretch of Birthday Season! Ella will be having a Tinker Bell themed birthday party this Saturday. One of the things that we like to do at parties is to have a pinata for the kids to bust open. However, purchasing a ready-made one usually costs $15-25. Personally, I don't want to spend $15 on something that will just be smashed to pieces. Instead, I make my own for virtually nothing. Yes, it does take more time but I like saving money and having creative control over the pinata. Typically, I try to chose something that would be appropriate to smash up. There is just something that disturbs me about smashing up a princess-shaped pinata.

Two years ago, I attempted my first pinata. Ella was having a Castle Party so I crafted a dragon pinata for the party-goers to slay.

This year, I decided to make an acorn to go with the Pixie Hollow theme. If you watch the recent Tinker Bell movie, you'll notice that the "tinker" fairies use acorns to create things like pots. Things of nature are prominently featured in the world of Pixie Hollow. Since a balloon is shaped similarly to an acorn, I thought it would be an easy shape to accomplish.

Here's how I did it...

What you need:

  • A batch of papier-mâché paste (about half of this recipe would have been more than sufficient)
  • About 3 2-page spreads of newspaper, some colored sheets and some plain black/white
  • Inflated balloon
  • Bowl
  • Yarn
  • Toilet Paper Roll
  • Brown Paint
  • Large Brown Paper Bag
  • Scissors
  • Tape
  • Glue or double-sided tape
  • Glitter (optional)
Mix up a batch of papier-mâché paste and allow to cool.

Tear newspaper into strips about 1 to 1 1/2 inches wide. I alternated the color of newsprint on each layer to make sure that the areas had been covered sufficiently (ie. first layer black/white, second layer colored ads or comics, third layer black/white).

Place your inflated balloon on a bowl to hold it steady. Dip strips of newsprint into paste and smooth onto balloon until covered. Let this first layer dry -- putting it out in the sun will help this go much faster.

Apply a second layer (in a different color of newsprint) onto the balloon. Allow to dry.

Take a long length of yard and place the midpoint at the bottom (tied end) of the balloon. Run it along the sides and up to the top of the balloon and tie. Tape the yarn in a few places to secure it if necessary. Repeat on the other side of the balloon. This yarn will be what you use to suspend the pinata.

Apply a third layer and make sure to cover up the yarn. Allow to dry.

Cut a 2-inch hole on one side near the top of the pinata. Remove the broken balloon bits. This will be where you fill the pinata with candy. (Alternatively, you could create your pinata with a hole in it to begin with by leaving a portion of the balloon uncovered.)

Cut the cardboard toilet paper roll in half. This will become the acorn's stem. Run the yarn through the roll and secure the roll to the top of the pinata with tape.

Paint the entire pinata and "stem" with brown paint to resemble an acorn. Let dry.

Cut the paper bag into small oval shapes. (I used my Creative Memories Oval cutter which made it a snap!) If you wish, you can apply some glue and glitter around the edges of the ovals. Starting about 1/3 from the top of the pinata, apply the ovals in slightly overlapping rows until you reach the top of the pinata. Be sure to fill the pinata with treats before you cover up the hold with brown ovals.

------------------------------
For other money-saving ideas, be sure to check out Frugal Friday at Life as Mom.

Monday, January 24, 2011

Breakfast for A New Mom


Last week, my friend Dawn gave birth to a sweet baby girl. Whenever a friend has a baby, I always think back to what it was like when I became a new mother. It's hard to believe but that little newborn pictured above will be turning six years old this week! I was so very blessed to have friends around to help in those weeks of recovery. Many supplied homemade frozen dinners in advance and several brought over dinner. One friend in particular practically stocked our fridge with lots of ready-to-eat foods when we came home from the hospital. I don't think I had to plan a meal for at least a month.

Although I plan on bringing a home-cooked meal to Dawn and her family, I thought it might be fun to bring her some breakfast food too. Mornings are difficult for a mother of a newborn. In my experience, breakfast falls down on the list of essentials. But, I realized how easy AND inexpensive it can be to help out a mom in this way. Here are a couple meal suggestions to bless a mother of a newborn...
  • Pancake Breakfast - Last week, I visited Dawn and delivered a batch of Yogurt Pancakes, some homemade syrup (just sugar, water & Mapleline), and a box of pre-cooked bacon. The pancakes can be frozen and taken out as needed for a quick breakfast. 
  • Granola Breakfast - A few years ago, I made a batch of granola and delivered it with a tub of yogurt to a friend who had just had her first child. She had recently traveled to Germany where she enjoyed granola with yogurt frequently, so I knew that she would like it.
  • Quiche Breakfast - Quiche is an easy dish to make ahead. Broccoli Quiche is one of my favorite dishes to make these days - it's inexpensive AND yummy. If you make it ahead, it just needs to be reheated in the oven at 325 for about 15 minutes, and it is ready to serve.
Do you have any easy-to-deliver breakfast ideas? Post them in the comments.

Friday, January 21, 2011

Save at Restaurants.com

Yesterday at MOPS a mom from my table shared with me about how she has saved money when eating out by buying gift certificates at Restaurants.com. We don't eat out very often; however, I thought it was worth checking out to see if there was a way to save money in those instances when we do.

We don't live in a very big town, so I was pleasantly surprised to find out that 9 nearby restaurants offer gift certificates through this site, and I have already enjoyed eating at 4 of them. Once you find a restaurant that you want to try, you can purchase a gift certificate at a discount. For instance, my local restaurants all offered $25 gift certificates for $10. Some offered other denominations including $100 certificates for $40. Of course, there are certain restrictions. Most restaurants required a minimum purchase of $35 plus 18% included gratuity before the discount. In addition, only one restaurant-specific gift certificate can be redeemed per party, per month, per restaurant even if the party is seated at separate tables and/or receives separate checks.

Right now until January 24th, most $25 gift certificates are only $3 when you use the coupon code ENJOY. I decided to go ahead and try it at a restaurant that I know we'll go to eventually. Normally, it is easy for our family to spend $35 at this particular restaurant that I chose. With tax plus tip, the bill would normally come to about $45. After redeeming the certificate, it would be $20 at the restaurant plus the initial cost of the certificate ($3 with coupon code). So, for $23 my family can enjoy a meal out that would normally cost us $45. Not a bad deal.

However, I actually got a FREE BONUS certificate too! I turned down the "free coupon" at checkout and ended up getting a $10 certificate from Restaurants.com. (I'm not sure whether or not I would have gotten the "free bonus" if I took the "free coupon.") Unfortunately, I wasn't able to roll over this certificate into purchasing the discounted certificates. But, I was able to get a $10 gift certificate (with a $20 minimum purchase) at another place we've enjoyed eating.

It looks like we just might be eating out at some point this weekend. Yippee!

----------------------------------------
For other money-saving tips, check out Frugal Friday at Life as Mom.

Thursday, January 20, 2011

Broccoli Quiche


Quiche is one of those meals that we have pretty regularly at our place. Yes, my husband AND kids like quiche. My girls like to call it "Eggy Pie." It is a great meal to make because it's economical, and I usually have all the ingredients in the fridge. Oftentimes, I'll make two at a time -- one for dinner and one for my contribution to my MOPS brunch the next morning. I find that it makes a good meatless contribution to a buffet. If you make it ahead, just reheat it in the oven at 325 degrees for about 15 minutes.

Broccoli Quiche

1 pie crust (I use my Gramma John's pat-in-pan crust but omit the salt since I use salted butter)
2 Tablespoons butter
1/2 cup onion, chopped
1 clove garlic, minced
2 cups broccoli, finely chopped
3/4 cup cheddar cheese, divided usage
1/2 cup parmesan cheese, divided usage
4 eggs
3/4 cup half-and-half (or milk)
1 teaspoon dried parsley
salt & pepper

Prehead oven to 375 degrees. In a pan, melt butter and cook onion, garlic and broccoli until soft. Season with 1/2 teaspoon salt. In the bottom of the pie crust, layer 1/4 cup cheddar cheese and 1/4 cup parmesan cheese and press down firmly. Spoon on the broccoli mixture and spread evenly. Top with the remaining 1/2 cup cheddar and 1/4 cup parmesan. In a bowl, combine eggs, half-and-half, dried parsley, 1/2 teaspoon salt and 1/4 teaspoon pepper. Carefully pour into pie crust. Bake at 375 degrees for about 45 minutes.

-------------------------------------
For other meatless recipes, be sure to drop by Life as Mom today for Ultimate Recipe Swap.

Wednesday, January 19, 2011

Breaking Bad Habits

Last night, Ella was in quite the energetic mood...so energetic that she decided to start kicking her bedroom door over and over. When we told her to stop and asked why she did it in the first place, she responded "I was trying to get my energy out." Since she knows better than to punch the doors, walls, etc., Brett had her calm down in a "time-out" for a few minutes. After it was over, he talked to her about it and somehow they decided that she should make a door sign to help remind her not to kick the door. The girl will embrace any opportunity to draw. So, she got to work...


Don't you just love it? On the left side, we have what to do (notice the check mark). On the right side, we have what NOT to do.

And while she was at it, she decided to make a couple of signs to remind her not to indulge in a few of her other bad habits, like...


sucking on her hair...AND


biting her fingernails!

Oh, how I love my girl, short fingernails and all.

Speaking of short fingernails, if anyone has ideas on how to break the nail biting habit, I'm all ears! I'm working with Ella on this right now. She bites them down until they bleed. I haven't been able to get her to pinpoint a specific reason WHY she does it other than she is hungry. Yes, she actually told me that. Funny child.

Tuesday, January 18, 2011

To Run or Not To Run?

The other day, I cracked open my library copy of The Happiness Project. I haven't gotten far into reading it, but it has already gotten me to thinking about changes I could make in my life. In Chapter 1, the author talks about boosting energy by exercise. Exercise? What's that?!

Although I used to be a fit dancer back in my high school days, those days are far behind me. Dancing was the only form of exercise I ever did. It was fun, and I loved it. In my college days, I tried out the gym but it just wasn't for me. I tried running once or twice, but I certainly didn't love that. However, I know enough about running to know that it takes consistency to make it more enjoyable. This week, I've been thinking...what if I start running?

A friend from MOPS is thinking of starting a running group with the hopes of running in a local half-marathon. Half-marathon! That's 13 miles! That sounds like 2 1/2 hours of torture. But part of me is wondering, What if?

I certainly haven't decided to run a half-marathon, but I am toying with the idea. Part of me likes the challenge of doing something difficult that I've never even considered. Part of me likes the idea of doing it with others. So, if I could find the time and energy, it could be cool. Luckily, it is one form of exercise that doesn't require special equipment except shoes...and I've been wearing Asics Gels for the past 15 years anyway. And so I contemplate...

Has anyone ever discovered a great love of running? Or do you find it to be just plain torture?

Monday, January 17, 2011

Martin Luther King, Jr.


Today is Martin Luther King, Jr. Day. Many people look forward to today for the day off of work. I know that when I was in school and when I was in the "working world," I loved having the day off. But, rarely did I ever think much about WHY I had the day off.

Although Ella is in public school and learned a bit about Martin Luther King, Jr. last week, I really wanted to make sure that we talked about him today. This morning, I realized that we don't have any books about MLK and thought that it might be a nice day to pick one up.

With the promise of sharing a smoothie and a new book, Lucie and Ella were ecstatic to head over to the local coffeeshop / bookstore. Since we own several books in the Picture Book Biographies series by David Adler (Abraham Lincoln, Thomas Jefferson and Benjamin Franklin), I was hoping that I might find A Picture Book of Martin Luther King, Jr. today. Unfortunately, they didn't have any in stock, but we were able to pick up a copy of Free At Last: The Story of Martin Luther King, Jr (DK Readers). Although the content was definitely over Lucie's head, Ella listened and asked questions throughout the book. As with most DK books, it had a nice combination of illustrations and photographs and plenty of information. It was a nice way to spend the afternoon with my girls and remember a great man who made such a difference in our country's history.

Sunday, January 16, 2011

New Domain Name

Hey folks! Just wanted to let you know that I've got a new domain name. From now on, you can visit us here directly at www.LifewithLandE.com. I figure that it is a bit easier than trying to remember how to spell that Dutch last name of mine. But have no fear, good ol' Blogger will make sure that traffic from my old address reroutes to this new one. However, things are in "transition" right now so if a link doesn't work right away, try refreshing the page and see if that helps. Thanks for stopping by!

Friday, January 14, 2011

Fun Friday: Pretzel Wands

When Ella began kindergarten in September, she had a difficult time adjusting to the five day schedule. Although she had loved going to preschool three times per week, five days was a bit overwhelming to her. She didn't have enough fun time at home. Quite frankly, I missed the fun time together too. So, I instituted "Fun Friday" soon after the beginning of the school year.

On most Fridays, Lucie and I pick Ella up from school, and we head into town to do something fun together. Most of the time, we head to a cute little courtyard with a fountain where we have a little picnic on the bench. Then afterwards, we share a frozen yogurt or play at the nearby toy store.

This past Friday though, we had "Fun Friday" at home. Since Lucie's favorite birthday gift was the "cooking book," I decided that we should actually use the book. I chose an easy recipe for "Sparkly Wands" and modified it to use items we already had stocked in our kitchen. Since I didn't actually have to go buy anything for it, I looked at it as a Free Fun Friday. Plus, it's so easy a three year old can do it. Such a simple way to spend a half an hour with my girls, yet it brought so much joy to them. Why not embrace those simple moments of fun?

Wanna know how we made our wands? Here you go...

Pretzel Wands
Melt some candy melts in a small bowl or ramekin according to package directions. Dip pretzel sticks into the melted candy and twist to coat one half of the pretzel. Roll the candy-coated end of the pretzel  into your choice of sprinkles or colored sugars. Set on a a sheet of waxed or parchment paper to harden. Enjoy!

----------------------------------
For other frugal tips, check out Life as Mom for Frugal Friday.

Thursday, January 13, 2011

Italian Zucchini

When it comes to cooking dinner, I usually put most of my effort into the main dish and keep the side dishes simple. Most days, I heat up some frozen veggies or toss together a Caesar Salad. However, this week, I found Italian Squash (aka Zuchini, aka Courgette) on sale for $0.59/pound, so I decided to cook an actual side dish. I learned how to do this from my best friend Jill...who learned it from one of her friends. I don't know if it has an official name or not, so I just call it Italian Zucchini.

Italian Zucchini

2 Tablespoons olive oil
1 clove garlic, minced
1/2 teaspoon sea salt
2 zucchini
dried oregano, to taste
parmesan, to taste

In a small bowl, combine the olive oil, garlic and sea salt. Slice the zucchini into thin rounds. In a small baking dish, place a layer of zucchini. Brush zucchini with olive oil mixture and then sprinkle on a little dried oregano and Parmesan cheese. Repeat until you've used all the zucchini. Cover with aluminum foil and bake at 350 degrees for about thirty minutes or until your zucchini is to your desired tenderness.

------------------------------------------------
For other vegetable recipes, be sure to check out Life as Mom for Ultimate Recipe Swap.

Wednesday, January 12, 2011

Goal for 2011: Scrapbooking


Last week, my sister Jessica posed the question, "To scrapbook or not?" It got me to thinking about my albums that are languishing in my bedroom. Once upon a time, I found great joy in scrapbooking. Then, I started dating Brett during my Senior Year in college and scrapbooking fell by the wayside. One of our first "dates" was actually working on a scrapbook for his summer trip to Europe. Believe it or not, that was his idea. I guess he was trying to win me over or something. (In case you were wondering, that album was never finished either. We haven't touched that album since that date. Yikes!)

So, one of my goals this year is to begin to catch up on my scrapbooks. I have several in various states of completion -- France 1997-1998, Wedding, Ella's Baby Album and Lucie's Baby Album. I think that first and foremost, I need to finish my wedding album. I began it in 2001 when I got married. Perhaps I can complete it before we celebrate our first decade of marriage at the end of March. What an anniversary gift that will make! It's funny...when I initially asked Brett if he minded if I made our wedding album instead of leaving it to the photographer, his response was something along the lines of, "Well, as long as we actually get a scrapbook put together." What a patient man!

So, I'm open to tips! Anyone have some great ideas on how to get an album finished?

Tuesday, January 11, 2011

Booking It in 2011


Once upon a time, I was a reader. Oh, did I love to read! However, once I started reading a book, I couldn't put it down until I finished the last page. Needless to say, that particular reading style doesn't jive well with marriage and being a mother to 2 kids. So, my marathon reads have been few and far between during the past decade or so. I usually reserve them for when my hubby is out of town. That's pretty much how I got through Harry Potter and the Twilight Series. (Yes, sometimes I read juvenile fiction. And yes, those two series are quite addictive.)

This year, I think I'm going to attempt to read and not to neglect my family in the process. I figure if I can read one book a month (and avoid any seriously addicting series of books), I might find some enjoyment and maybe learn something new along the way. So, I'm going to join the other readers at Life as Mom for "Booking It in 2011." For some months, I will follow along with the "assigned" reading and for some I'll "choose my own adventure." Of course, I'm not so organized that I've actually assigned specific months to certain books. But, this is what I'm looking at over the course of the year:
Of course, I reserve the right to change this list at any moment...but this is what I'm thinking of right now. Hey, what is Lord Jim doing in that picture above? Under no circumstances will I be adding Lord Jim to my list. That is one book that I hope never to reread. (I'm not sure why we even OWN that book? Maybe just so it looks pretty on the shelf?) I read it in the 11th Grade, and it seriously made me narcoleptic. But hey, if you're having trouble sleeping, you might want to give it a try.

Monday, January 10, 2011

Planning the Last Birthday Party of the Season


Now that Lucie's 3rd Birthday is behind us, I have just one more event in Birthday Season 2011-2011. Once we get past Ella's birthday in a couple of weeks, I'm off the hook for the next ten months! Overall, it has been pretty manageable, and I hope to keep it that way!

When Ella started preschool, we started throwing her traditional "friend" birthday parties because she actually had "friends" in the plural sense. Plus, in my opinion, a two or three-year old really doesn't care too much about a big party. If you give them a cake, they're happy. (See case in point.) But, a four-year old who is in preschool? Oh man, are birthday parties exciting to them! Ella chose a Castle Party for her 4th Birthday and a Fancy Nancy Explorer Extraordinaire Party for her 5th. They were so much fun and gave her so much joy.

This past weekend, we started planning her 6th Birthday Party. On Saturday morning, I printed out this nifty little Birthday Planning Page from FishMama, and we sat down to work. Ever since we checked out Tinker Bell from the library, Ella has loved Tinker Bell and the world of fairies. So, Ella will be having a Pixie Hollow Birthday, and I'm so excited about the possibilities! Stay tuned for more details...and possibly a cake and pinata tutorial.

Friday, January 07, 2011

Fun & Free 2011 Wall Calendar

Last month, you might recall that I shared an idea for making a Christmas 2010 calendar with your kids. The idea originated from one of the mentors at my local MOPS group. My girls LOVED creating it, and we ended up hanging it on the door in our kitchen that leads to the garage. Throughout the month, we hung up some of their other holiday art projects around it. It made for some festive decor that was practical too. Plus, Ella really loved seeing what was coming up on our schedule.

Usually, I rely on a desk calendar of my own making to keep track of my appointments. However, now that Ella is learning how to read calendars in school, I thought it would be fun to keep the wall calendar going on all year long. So, the other night, I sat down at the computer to put together another large wall calendar. I printed it on 4 sheets of paper, trimmed some edges and glued/taped it together. The girls were more than happy to draw something to represent January on their own sheet of paper. When their masterpieces were finished, I glued/taped them to the top. Since they were both born in January, they decided to go with a birthday theme for their creations.


As usual, Lucie wanted to draw a PINK Birthday Cake. She actually surprised me and drew the outline of the cake on her own. Of course, she did request my help for adding the decorations.


Ella drew pictures of herself with cupcakes, presents and a number 6 candle.

Right now, I am LOVING this new monthly tradition, and I think my girls do too. Since not everyone has the computer software or skills to design their own calendars, I decided to share mine with you. Just click on the link below to get the free PDF.

Click to download the free 2011 Wall Calendar.


Download Instructions: Since I'm using the free hosting at MediaFire, once you click through to MediaFire, you will see "Life with Lucie and Ella - Wall Calendar 2011" and a box that says "Click here to start download." When you click to start the download, a dialog box will pop up and ask if you want to open or save it to your computer. Make your selection, and it will be done in a jiffy. When you open the PDF, you can change the page view so you can see an entire month at at time. Click on VIEW and then PAGE DISPLAY and then TWO-UP CONTINUOUS. Printing and assembly instructions are included in the download. Enjoy!

Thursday, January 06, 2011

Chili Popcorn


Although I married into a family with a serious sweet tooth, I prefer to have a salty snack in the evening. When I was growing up, air-popped corn with melted butter was one of our favorites. In fact, I even took an air popper with me to college and stocked butter in my dorm room fridge. Despite the many varieties of microwave popcorn, I still think that air-popped tastes the best.

Don't get me wrong, popcorn with simple butter and salt is divine. But, after making some oil dipping seasoning for gifts this Christmas, I thought it might be fun to try some different flavorings for popcorn. Last night, I experimented with Chili Popcorn. It was tasty...and just as easy as the butter variety. If you don't like butter or are calorie-conscious, I hear they make butter-flavored sprays. I've never bought them because, like I said, I love butter. But, they just might work for those who don't.

Since tastes differ, you might want to adjust the amounts of butter or spices or even popcorn for that matter. I imagine that other seasonings would work as well. Popcorn is a versatile snack...and a whole grain one at that!

Chili Popcorn 

2 Tablespoons melted butter
1/2 teaspoon paprika
1/2 teaspoon chili powder
3/4 teaspoon salt
1/8 teaspoon garlic salt
4 drops Tabasco sauce
10 cups air-popped corn
1 Tablespoon Parmesan cheese

In a small bowl, melt the butter and mix in the seasonings. Pour over popcorn and toss well. Sprinkle some Parmesan cheese over the top. Enjoy!

--------------------------------------------
For other whole-grain recipes, check out Ultimate Recipe Swap at Life as Mom.

Wednesday, January 05, 2011

Lucie's 3rd Birthday

Lucie's 3rd birthday was hectic, but it managed to please a sweet three-year old girl. That was really my only goal. Although I was exhausted by the end of the day, it was really a nice day.The morning started off a bit special because our friend Olivia had spent the night. Her expectant mom needed to go to the hospital for observation, so Lucie ended up with 24-hour playdate. What kid doesn't love that?

After we picked up Ella from school, we headed out for a picnic lunch, some frozen yogurt and a trip to our favorite toy store. While the girls were playing with the Thomas the Train playset, I steathfully bought a Sleeping Beauty figure for the birthday cake. Lucie just loves Sleeping Beauty.

Later that evening, we tried to fit in a bit of a celebration before Brett had to go to Mock Trial practice. We invited Uncle Troy, Auntie Aimee and cousins Meli and Jilli to join us for one of Lucie's favorite meals - Honey Chicken with Rice. Unfortunately, we didn't have time to move onto the cake before Brett had to leave, but we videotaped it for him.


As I mentioned yesterday, Lucie had requested a pink cake with pink frosting. So, I did my best to recreate this cake with Sleeping Beauty replacing Rapunzel. Although it wasn't perfect, it managed to please a three-year old, and it tasted pretty darn good too. I couldn't find any chocolate rocks in town, so we substituted some color-coordinating Jelly Bellies instead. Since I couldn't find a pink number candle, we used traditional ones along the top. It took Lu several tries to blow them out, but it was fun to watch.


Of course, no birthday is complete without gifts. Lucie seemed to enjoy them all:


When asked at the end of the day, Lucie told me that she liked the "cooking book" the best. Since she's my little sous-chef, I wasn't too surprised. It was quite the princess birthday for my little princess.

Tuesday, January 04, 2011

Writing and Editing

You might have noticed the bit of a hiatus that I took last week. Once Christmas hit, we had a flurry of visits from family and some law school applications that needed to be submitted. No, no. I won't be applying to law school, but my husband will. This past week, he has been working diligently to apply to several throughout the country. And man, do they want applicants to write! I've stayed close to home and served as moral support / editor. I feel as if I've been living in that movie Groundhog Day where the main character lives the same day over and over. Each day has been a series of edit, clean, feed the kids, edit, clean feed the kids, etc. One day has blurred into the next. I even found myself scrutinizing my text messages for proper wording and punctuation! Needless to say, I will breathe a huge sigh of relief once all of his applications are submitted.

Relating to writing, I did receive one exciting piece of news last week from MOPS International. I got an email indicating that their bi-monthly magazine MomSense would like to publish one of my articles in their March/April 2011 issue. They published one of my pieces in their magazine before, and several on the MOPS website (herehere and here). Given my love for MOPS, I'm very excited to have another article in their magazine. I'll be sure to publish a link to it when it goes online.

Happy 3rd Birthday Lucie!


Yes, today is the anniversary of the day that I became the mom of Ella and Lucie and that Ella became a big sister. I guess, technically, she wasn't named Lucie on this day three years ago. She was "Baby No Name" as my sister affectionately dubbed her. I didn't mind her no name status while we were in the hospital. It was great fun to let folks chime in via this blog with their suggestions!

Tuesday is a busy day at our home, but we're going to do our best to celebrate Lucie. We're keeping it simple. We'll have a special lunch after school, ballet lessons for Lucie and then a dinner of Lucie's choice at home. Of course, since no birthday is complete without cake, Lucie has requested PINK cake with PINK frosting. So, I'm going to do my best to recreate this cake. Let's hope she doesn't turn pink like Pinkalicious! I'll let you know how it goes.

Happy Birthday Lucie!

Monday, January 03, 2011

New Year, New Look, New Goals

Since it is a new year, I thought that I'd go for a new header on my blog. Granted, it really isn't that different from the previous one, but I thought that it would be fun to add some pics of the girls. I'm also thinking about changing the header each month with updated pics of my cuties. The added bonus will be that I have pictures of both of them from each month throughout the year. Let me just say, I did not do such a great job in 2010 of capturing their changes on film...I mean on digital file. So, I'm looking for any way to encourage myself to be diligent!

Over the past couple of days, I've been thinking about what my blogging will look like this year. I really do enjoy it and find that it is much easier to blog than to sit down and scrapbook. (I still haven't finished my wedding album, and I got married almost 10 years ago!) My blog is a virtual scrapbook of sorts, one that I hope to keep updated unlike my albums. So, in the spirit of New Year's Resolutions, here are some of my goals for this blog:

  • Blog more frequently. I took LONG hiatus from blogging last year. It just too me awhile to adjust to the changes in our lives during the Fall. Finally at the end of November, I got back to it. I am amazed that I posted 5 times/week from Thanksgiving until Christmas. I'm not sure that I can keep up that pace, but I'd love to try.
  • Improve my photography. I've got a rockin' camera that I really don't know how to use. I just set it to manual and shoot away. I'm hoping to crack open that manual and maybe a book on photography to figure out a way to take better shots. I love being able to include good photos with my posts. They just seem more interesting to me that way.
  • Post some free downloads. In my life before this one with Lucie and Ella, I was an administrative assistant and spent my days creating documents on the computer. Its something that I still do, just for my own purposes rather than my boss'. Every once in awhile, I'd like to post a PDF of something that makes my life a little easier or a bit more fun. Stop by on Friday for the first free download!
  • Write about more than just my kids. Although I started this blog to share pics and stories with our far-off family, it has evolved into something more. I like to post about some of my interests outside of my kids: cooking, decorating, home improvement, writing. 
I hope you'll come back in the days and weeks to come. Although I still view this as a digital scrapbook, I'd like to know that I'm not talking to myself either! 

Saturday, January 01, 2011

Happy New Year!

Happy New Year from Janel, Ella, Lucie & Brett!